There is no question that OneNote is the most significant tool in my day-to-day work as an educator. It has featured in my teaching practice since 2008(!) In the next few blog posts, I will outline some of the ways I use this software to enhance my professional practice.
OneNote aids my teaching and learning in three significant ways. Firstly, I use OneNote as a private “thinking space” to explore and refine my ideas by curating research from online sources, links, documents, notes and even sketches (despite my lack of artistic skills!) Secondly, I use it as a dynamic intranet in my school and learning community to collaborate, share and connect with colleagues for day-to-day school life. Finally, I use OneNote and specifically the OneNote Class Notebook as a vibrant, comprehensive, pedagogical and learning space to interact and engage with my students using a few different levels of collaboration. I currently teach History and Communication Technology at the high school level, and I try to model my own use of OneNote as a learning tool and provide opportunities for students to use OneNote to explore their own private ideas in a safe “sandbox”. Not only does OneNote provide a safe place for them to develop their ideas to their potential but I actively encourage them to extend their ideas without fear of failure and adopt a growth mindset as articulated by Carol Dweck. In this digital space, I look to provide guidance, help and support at appropriate times to aid their progress and learning.
I truly value the idea of having a safe, private and versatile tool to record and refine ideas and OneNote provides this affordance as part of my information gathering and ongoing research. I have lost track of the amount of times I have later re-read or re-used materials for a lesson or presentation that I have collected and curated in a OneNote folder from my reading. OneNote provides a digital space curated by me to recall(and rediscover) ideas and materials. One of the challenges of self-directed or directed professional development is timing so that I can recall and apply my learning at the exact time needed in his profession. OneNote allows me to curate, save for a later time with easy recall thereby allowing me to work more effectively. Harold Jarche in his blog and writing outlines his Personal Knowledge Management (PKM) method which he “describes as a set of processes, individually constructed, to help each of us make sense of our world, and work more effectively. He has developed a popular Seek-Sense-Share framework which identifies the 3 key elements of PKM” (Hart, Web)
Below I created a diagram that outlines my daily habits in terms of knowledge accumulation based on the ideas of Jarche and inspired by the design of Hart. I re-created and personalized this diagram by adding the platforms and software relevant to my routines in the SEEK and SHARE stages.

OneNote offers opportunities to archive my research into relevant tabs, tags and pages with a search bar thrown in for good measure. When I am in the SENSE stage, I am either co-creating understanding of the material with my students or colleagues or simply storing the materials (text, media, links etc.) away for future analysis and study. OneNote is my choice for archiving relevant materials as it is more versatile than social bookmarking services as I can retain the material rather than being at the mercy of links remaining live or at the same URL. I use the Clip to OneNote browser extension but could also simply copy and paste the text and media from the web as OneNote automatically records the URL. The other advantage of this approach is that it keeps the material searchable in OneNote which is a time saver.

A Printout to OneNote is also available as a back up but the text is not searchable unless using an image to text conversion which cuts down on efficiency. Combining this routine of information gathering with the affordances of this software to include text, links with sketches, files, video, audio and increasingly more embeddable content (i.e. forms, videos etc.) allows OneNote to become a “redefining” tool for research, archiving and writing for teachers, students and learners. (Tagging the material is also an excellent routine but that aspect demands a separate post.)
This slideshow requires JavaScript.
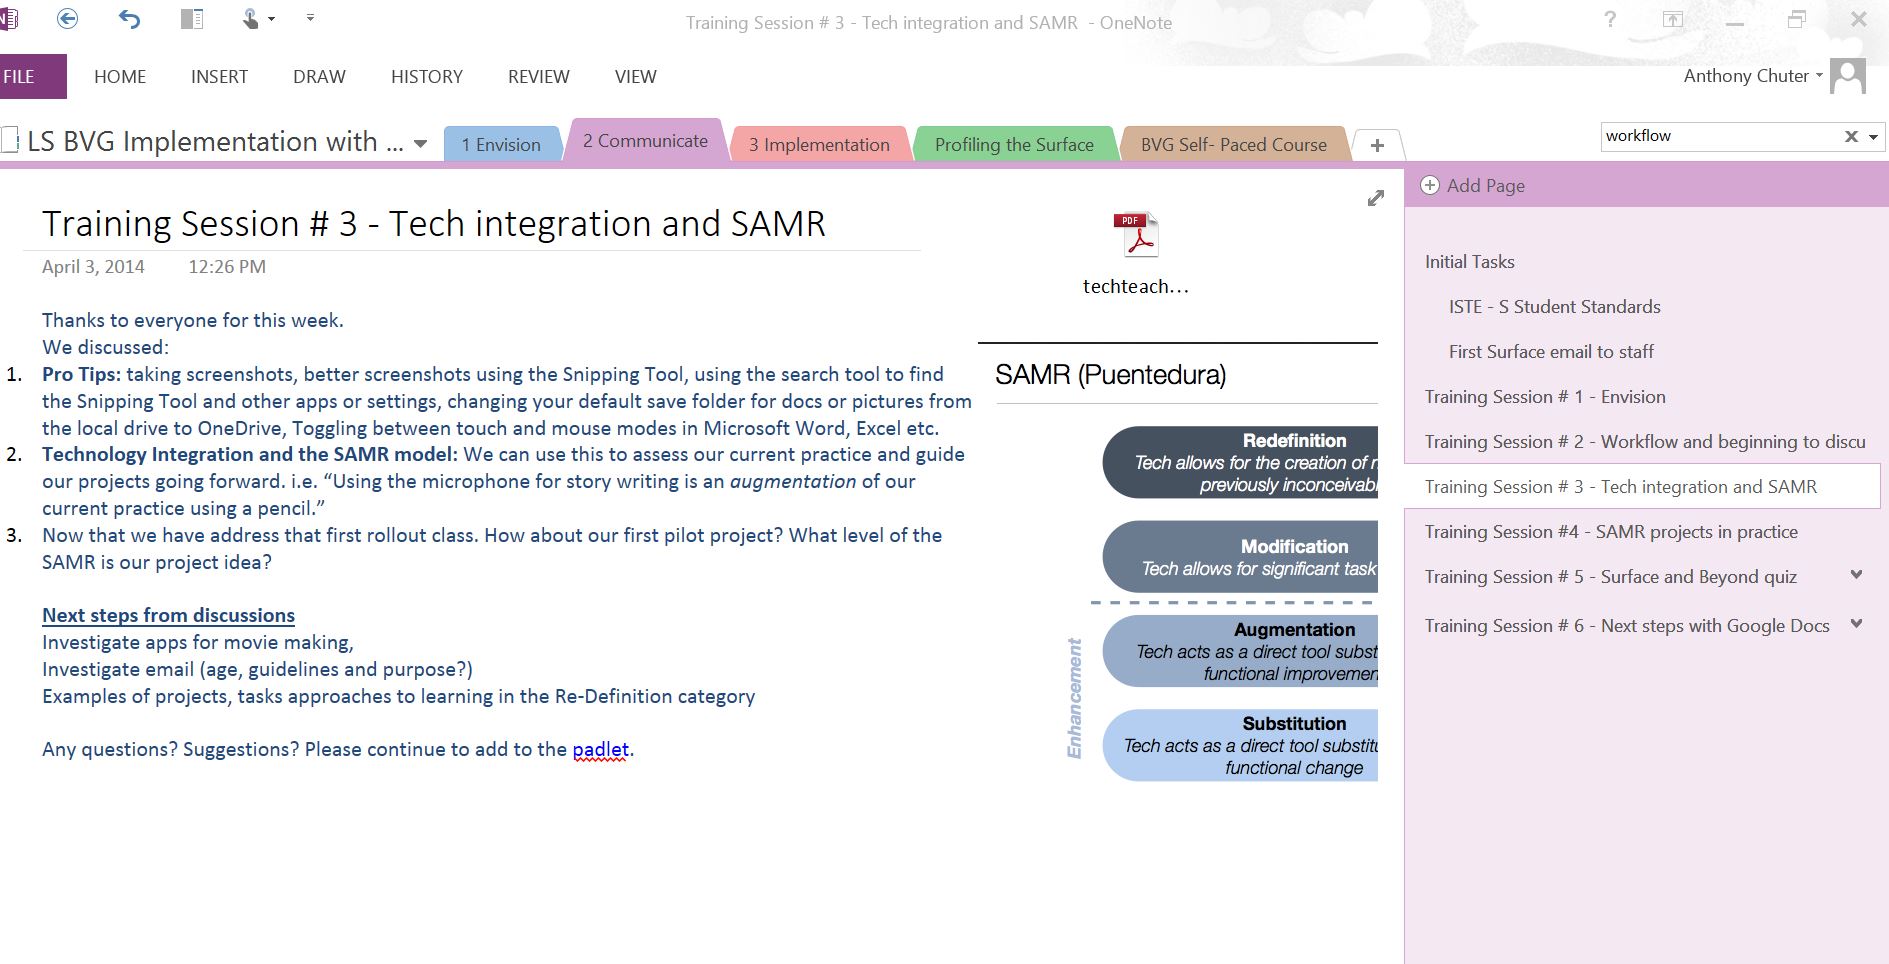
Below are a few screenshots from my OneNote folders below. I currently organize my notebooks by topic and course.

I use it to plan lessons with files, links, notes and reflections close at hand.

I use my folder to collect documentation that includes embeddable video content

In Part Two, I will discuss and share some of the ways in which my colleagues and I use OneNote as a working space and intranet to share and collaborate on our day-to-day adventures as educators in school life. Finally in Part 3, I will explore the advantages of the Class Notebook add-on which allows me to co-create my courses with my students creating a digital textbook and how OneNote can serve as a vibrant, creative, safe space or “thoughtbook” for innovation and design.
Thanks for reading. What did I miss? Feel free to comment below to make suggestions with how you use OneNote or other tools you use for archiving.
References
Dweck, Carol (2014) “Developing a Growth Mindset”. Dir. StanfordAlumni. YouTube. YouTube, 09 Oct. 2014. Web.
Gini-Neuman, Garfield and Laura. “Using Thoughtbooks to Sustain Inquiry” The Critical Thinking Consortium. 2016.
Hart, Jane (2013) Centre for Learning & Performance Technologies. “Learning in the Modern Workplace.” N.p., 02 Dec. 2013. Web. 15 July 2018. Retrieved from: http://www.c4lpt.co.uk/blog/2013/11/30/my-daily-pkm-routine-practices-and-toolset/
Jarche, Harold PKMastery., Posted 2013-12-02; Filed under. “Ask What Value You Can Add.”Harold Jarche. N.p., n.d. Web. 15 July 2018. Retrieved from: http://jarche.com/2013/12/ask-what-value-you-can-add/
Puentedura, Ruben (2014). Learning, Technology, and the SAMR Model: Goals, Processes, and Practice. Available from http://www.hippasus.com/rrpweblog/archives/2014/06/29/LearningTechnologySAMRModel.pdf
 A page from our shared OneNote Class Notebook
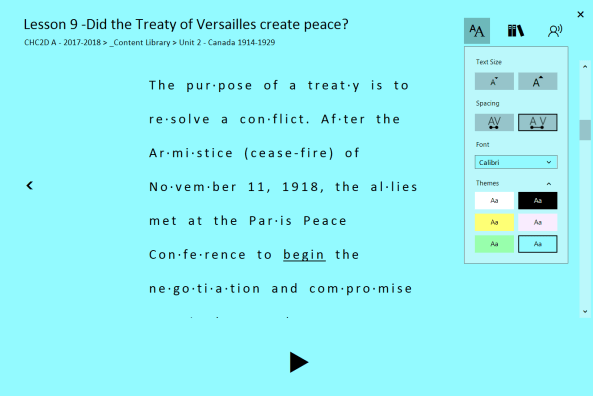 A sample page using the Immersive Reader.